Using the Metadata Generator
Overview and Notes
What is EDI?
The Electronic Documents of Illinois (EDI) stores state agency documents and makes them accessible for the long-term. Agencies benefit because they don’t need to maintain servers or access. Agencies simply need to submit each document with its description to the depository. The Illinois State Library (ISL) will take care of maintaining the servers and keeping older documents accessible. In addition, the ISL provides a common portal for all online state agency documents – Find-It! Illinois.
Since 1967 the State Library has preserved state agencies’ documents and made them accessible to the public through the Illinois Documents Depository Program (IDDP). The State Library Act (15 ILCS 320/21) requires State Agencies to deposit their public documents with the Illinois State Library. The Library sets standards for agencies to follow, stores documents for the long-term, and maintains access for the public. The Administrative Code (Sections 3020.110 and 3020.120) outlines procedures for complying with the State Library Act. State Agencies are required to deposit 40 copies of all public documents produced and distributed in a tangible format, such as print, CD or cassette. State Universities are required to deposit three copies and University Presses two copies. Agencies must include a contact name, address, and phone when submitting the documents. If you have questions regarding the depository program for tangible items, please contact: Joe Natale, Illinois Documents Coordinator, 217-558-4185, jnatale@ilsos.net
Now the program
includes electronic documents. The State Library developed EDI to handle the
electronic  component of state government documents,
including electronic copies of tangible items and documents “born” digital.
Metadata, information about the document being deposited, is required. EDI was
developed as a prototype by the Graduate School of Library and Information
Science at the University of Illinois at Urbana-Champaign and the Illinois
State Library with partial funding from the Institute of Museum and Library
Services.
component of state government documents,
including electronic copies of tangible items and documents “born” digital.
Metadata, information about the document being deposited, is required. EDI was
developed as a prototype by the Graduate School of Library and Information
Science at the University of Illinois at Urbana-Champaign and the Illinois
State Library with partial funding from the Institute of Museum and Library
Services.
NOTE: Depositing electronic documents with EDI does NOT replace requirements from the Illinois State Archives.
What to deposit?
 While the depository accepts all file formats, long-term
readability of some files, especially those containing scripts, cannot be
assured. Web files should comply with Illinois
Web Accessibility Standards. Pages that meet these standards are in
compliance with tier I of W3C (World Wide Web
Consortium) Standards and Federal
Section 508.
While the depository accepts all file formats, long-term
readability of some files, especially those containing scripts, cannot be
assured. Web files should comply with Illinois
Web Accessibility Standards. Pages that meet these standards are in
compliance with tier I of W3C (World Wide Web
Consortium) Standards and Federal
Section 508.
 Standardized, consistent and complete
coding and will help keep your pages readable as software(s) evolve. For
instance, include beginning and ending marks for paragraphs. Use the same title
in the <title> field, at the top of the document, and in the Publication
title field of the metadata. W3C provides an html syntax checker that will help
you catch errors in your files before you post them (http://validator.w3.org/).
Standardized, consistent and complete
coding and will help keep your pages readable as software(s) evolve. For
instance, include beginning and ending marks for paragraphs. Use the same title
in the <title> field, at the top of the document, and in the Publication
title field of the metadata. W3C provides an html syntax checker that will help
you catch errors in your files before you post them (http://validator.w3.org/).
![]() Section 508, or Bobby, sets
accessibility standards. You can computer check your files to see that they
meet handicap accessibility standards (http://webxact.watchfire.com)
Section 508, or Bobby, sets
accessibility standards. You can computer check your files to see that they
meet handicap accessibility standards (http://webxact.watchfire.com)
There are provisions in the depository to prevent free distribution of copyrighted documents or documents for sale by your agency.
Here is a summary of which documents to add to the depository:
|
Deposit |
D |
Do NOT Deposit |
|
|
|
|
|
|
|
Web pages displaying solely menus of links |
|
Public Documents |
D |
Documents Exempt from the Freedom of Information Act |
|
|
|
Internal memorandums |
|
Final version for release to the public |
|
Working drafts not “published” |
|
|
|
|
|
|
|
Individual forms |
|
Copyrighted documents |
|
|
|
Documents for sale by your agency |
|
|
|
|
|
Ephemera |
|
|
Examples |
|
|
Annual Reports |
|
|
|
Newsletters |
|
|
|
Bulletins |
|
|
|
Brochures |
|
|
|
Fact Sheets |
|
|
|
Press Releases from Constitutional Officers |
|
|
|
|
|
Conference announcements |
|
Approved Budget |
D |
Working budgets or drafts |
|
IL-1040 Tax Booklet with forms and instructions |
D |
IL-1040 Forms |
Avoid depositing duplicates. Deposit modified files or new versions of publications, but duplicates of the same file will only create more matches and confusion for the future user of the depository.
What and Why of Metadata?
Metadata is data about data, usually data that describes electronic files. Metadata:
· Assists in organizing files;
· Allows search engines to use more selective search strategies;
· Helps maintain data files over time;
· Facilitates data migration; and
· Facilitates management of copyright issues.
Because metadata facilitates Web searching, the ISL recommends that agencies embed metadata in the <HEAD> portion of the main Web page for each document. This will improve searching on Illinois Government Information (IGI) and public search engines. The ISL requires metadata for each document submitted to the depository. In addition to improving searching, metadata also facilitates copyright management and maintenance of hardware and software access over time.
The Metadata Generator
The Metadata Generator, created by the Illinois State Library, allows you to create metadata by filling in the blanks of a form. The Generator properly tags and codes your information, creating metadata that can be pasted into a mark-up language document or submitted with a document. The Generator also walks agency staff through the steps required to submit a document to the EDI depository.
Using a Web browser go to the login screen of the Metadata Generator (http://www.finditillinois.org/metadata/index2.html)
A login and password are required to use the Metadata Generator. To obtain a login and password contact Bill Echelbarger -- wechelbarger@ilsos.net
Enter your login and
password in their respective boxes, then click ![]() .
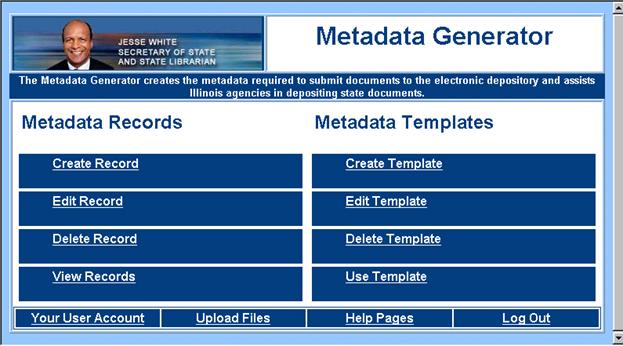
If you successfully login you will go to the Main Menu Screen.
.
If you successfully login you will go to the Main Menu Screen.
DO NOT SHARE LOGINS AND PASSWORDS. Each account in the Metadata Generator is customized for an individual user.
The Main Menu
The main menu is the pivotal screen of the Metadata Generator. Buttons on the left control metadata records, or the metadata created for an individual document. Buttons on the right side of the screen allow you to create and change templates, which you decide to store in your account. Templates contain partial metadata that can be used repeatedly as the basis for individual records. Buttons along the bottom allow you to maintain your account, submit documents to the depository, access online help or logout from the main menu.
Templates are
available to only their creator, and they can make your work much easier. If
you click ![]() or
or ![]() you’ll
find access to the templates you’ve stored as well as a blank record from which
you can create an individual record or a new template.
you’ll
find access to the templates you’ve stored as well as a blank record from which
you can create an individual record or a new template.
What is a Document?
Documents will exist in the depository as cohesive units. Each unit will have a metadata record describing it. Information in the metadata will aid in accessing and preserving the file(s) that comprise the document.
Staff of the publishing agency will determine which files comprise a document. Current Web links will not work in the depository. Instead, files will need to be deposited together so the user can retrieve them together and reconstruct the document. For example:
· A Web page needs to be deposited with all of the files needed to construct the page, including graphics files, banner and style sheets. It is easiest to use Adobe Acrobat Distiller to create a PDF file of a Web page and deposit the PDF file. Otherwise it’s very complicated to get all of the files that compose the page and modify the file addresses so that the page will reconstruct.
· Postings of traditional print publications that have been broken down into multiple PDF files need to be deposited together.
Here are some examples:
![]() Bicycle
Rules of the Road is complete in one PDF file,
Bicycle
Rules of the Road is complete in one PDF file,
![]() Illinois
Handbook of Government consists of several html pages that serve as navigation
menus for the PDF files that compose the electronic version of this document.
There are also banner and picture files that display
as part of the Web pages.
Illinois
Handbook of Government consists of several html pages that serve as navigation
menus for the PDF files that compose the electronic version of this document.
There are also banner and picture files that display
as part of the Web pages.
![]() Investment
Advisers consists of several html pages
linked together, their banner, style sheets, and PDF files of forms
Investment
Advisers consists of several html pages
linked together, their banner, style sheets, and PDF files of forms
Collecting all of the files that need to be deposited together is an important first step. It also helps to gather information about your document – such as the date it was issued to the public (published), the software used to create the file, and an understanding of the contents of the document. This information will make it much easier and faster to fill in the blanks of the Metadata Generator.
Why Begin With a Template?
Templates save inputting time. Whenever fields are the same from record to record you can begin with a template where the repeated fields are already completed. Templates only appear in the account in which they are made, so create them in your account as you feel they will assist you.
Begin on the main
menu. Click ![]() or
or ![]() .
Since this is the first template or record you’re creating you’ll be taken
directly to an empty data form. Otherwise you could choose one of the templates
in your list (click on
.
Since this is the first template or record you’re creating you’ll be taken
directly to an empty data form. Otherwise you could choose one of the templates
in your list (click on ![]() below the template you
want to use) as the basis for your new template. Creating one template from
another will result in two templates.
below the template you
want to use) as the basis for your new template. Creating one template from
another will result in two templates.
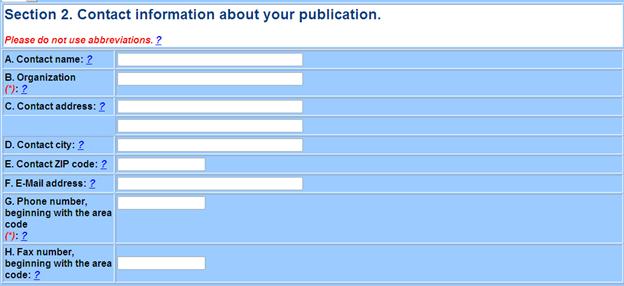 Frequently the information in Section 2 is
repeated from one metadata record to the next, so using a template to store
contact information for your agency will save you time.
Frequently the information in Section 2 is
repeated from one metadata record to the next, so using a template to store
contact information for your agency will save you time.
Agencies complete this Section differently depending on their structure. Some agencies assign responsibility to a person while others have an office responsible for all publication requests. Your organization’s name and a phone number, preferably one answered by a person able to answer questions regarding the publication, are the only two required fields. Provide as much information as possible. At larger agencies where responsibility is divided between several individuals, you could create a template for each person.
Fields marked (*) are not required for templates but must be completed before you can create a metadata record.
 Section 3, Issuing Agency is also
frequently repeated from one document to the next. Use the pull down menu to
select the correct name for the publication. The list is customized for each
login to keep it from getting too long.
Section 3, Issuing Agency is also
frequently repeated from one document to the next. Use the pull down menu to
select the correct name for the publication. The list is customized for each
login to keep it from getting too long.
Create a Template – Agency Information
Begin on the main menu.
Click ![]() or
or ![]() .
Since this is the first template or record you’re creating you’ll be taken
directly to an empty data form. Scroll down to
.
Since this is the first template or record you’re creating you’ll be taken
directly to an empty data form. Scroll down to
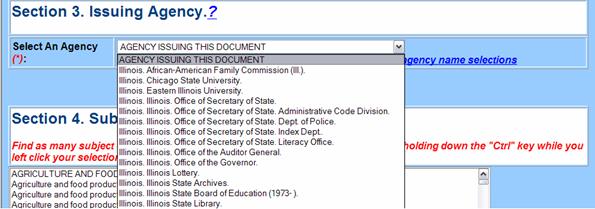
Choose the name that
appears on a prominent part of you publication such as the title page,
masthead, or top of the document. If the name you need doesn’t appear in your
list, e-mail the ISL Technical Services Division to request that the name of an
agency or one of its divisions be added to the list in your account. Click ![]() for
a pre-addressed email form. Attach to the e-mail the file where the name
appears. This will help the State Library add the correct form of the name to
your account.
for
a pre-addressed email form. Attach to the e-mail the file where the name
appears. This will help the State Library add the correct form of the name to
your account.
A state agency is defined in the Illinois Administrative Code as any organizational entity that “expends appropriations of state funds.” Examples of state agencies include:
· Chicago Area Transportation Study
· Illinois Arts Council
· Illinois Department of Public Health
· Illinois Institute for Rural Affairs
If the structure of your agency changes, or its name changes, contact the Illinois State Library (islcat@ilsos.net) for a new form of the name to use on documents issued after the change.
When you have finished entering all of the data you will use repetitively, go to the top of the data input screen to assign a name to this template. This template will only appear in your account, so assign a name you’ll recognize. Fill in:
![]()
To store your template for
later use scroll to the bottom of the data input screen and click
![]() .
.
Another great use for a template!! Save a partial record when you’re interrupted. You can then use the template to complete the record at a later time. When you’re finished you can delete the template from your account if you no longer want it.
Customize the remaining fields in a metadata record, Sections 1 and 4, to match the document you’re submitting. If you have a series of documents where much of the information is the same in each field, you can create a template for that series. Templates only exist in your account. Customize them to serve your needs.
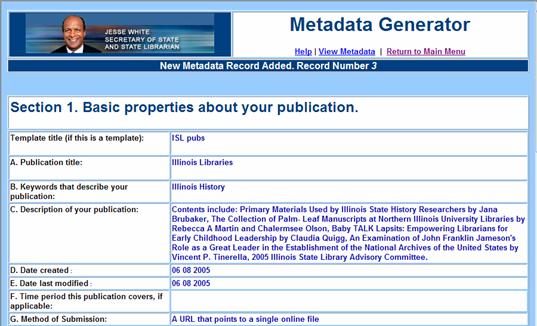
Creating a Metadata Record – Describing the Document
Section 1 of the metadata record contains data describing the document. Although you may want to store some of these fields in a template to reuse from one title to the next, fields in this section will often vary from document to document.
It is very important that the information in Section 1 describe the specific document you are submitting with the metadata record. If you have an ongoing publication like Securities Bulletin (example below), make sure you describe the contents of the specific issue you’re submitting.
Open a template with the correct agency and contact information. Then proceed to fill in the fields of Section 1
![]()
Clicking on ? at any point on this form will take you to context sensitive help regarding that specific field of the metadata generator.
Document Title
Enter the title as it
appears on the document. This is the title by which the user will know the  document. If your document
is in a mark-up language make sure the title tag matches what actually appears
on the
document. If your document
is in a mark-up language make sure the title tag matches what actually appears
on the ![]() document and what you have entered for the document
title in the metadata. This consistency will facilitate access to your document
because search engines use data fields differently.
document and what you have entered for the document
title in the metadata. This consistency will facilitate access to your document
because search engines use data fields differently.
![]()
 Some titles include
numbering. When the number is not an integral part of the title, such as in the
Educational Mandates example, you may leave the numbering out of the title.
However when the numbering is an integral part of the title, as in the
Some titles include
numbering. When the number is not an integral part of the title, such as in the
Educational Mandates example, you may leave the numbering out of the title.
However when the numbering is an integral part of the title, as in the ![]() Adams County 2004 Taxing
Districts,
Adams County 2004 Taxing
Districts, ![]() include the numbering in the title.
include the numbering in the title.
Keywords
Keyword searching is a primary method of access for all users. Certain data fields are automatically included in the keyword access for any document, such as title and description. Enter in this field other keywords or key phrases for your document. Include:
· Common subject terms in your publication as well as their synonyms.
· Alternate titles by which your document is known, but which are not in the title field.
· Personal author names or other important personal names that appear on your document.
· Alternate spellings and common misspellings.
· Acronyms connected with your document. For instance,
For instance, for a document about mule deer you would want to enter its scientific name, Odocoileus Hemionus, as a keyword as well.
a document issued by the Illinois State Board of Education should be accessible by its acronym, ISBE.
|
|
|
|
|
|

Description
The description summarizes
the content and purpose of the publication. It should be 2 to 4 sentences, less
than 100  words. Feel free to copy and paste the description
from another source. The EDI search engine does not index the complete
text of the publication, but it does index the description. A concise, yet
complete, description of your publication is important.
words. Feel free to copy and paste the description
from another source. The EDI search engine does not index the complete
text of the publication, but it does index the description. A concise, yet
complete, description of your publication is important.
Date Created and/or Modified
![]() Dates are critical for sorting different versions of
documents. Date Created is when the document was officially released to the
public. It corresponds with publication date for a printed document.
Dates are critical for sorting different versions of
documents. Date Created is when the document was officially released to the
public. It corresponds with publication date for a printed document.
![]() Date Modified will be the same as date created except
when the contents of the document are revised and reissued. Two different dates
in these fields means that the content of the
documents is different or the file format has changed.
Date Modified will be the same as date created except
when the contents of the document are revised and reissued. Two different dates
in these fields means that the content of the
documents is different or the file format has changed.
|


NOTE: Dates are entered in MM/DD/YYYY format. Only a year is required, but the more specific the date the easier it will be to separate different versions of documents in the future. Consistent date format is very important.
Time Period Covered
If your document covers information during a specific time period, enter the time period here. Often this information is part of the title, but it may be included in preface material. Examples:
![]()
![]()

![]()
Submission Choices
There are two methods for submitting a document to the depository. Which one you choose depends on your document.
|
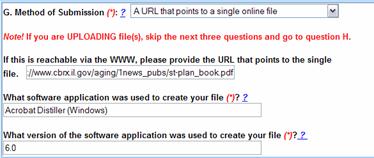 A document that is self-contained in one file and is
posted on the Web can be harvested by a spider. All you need to do at the time
you create metadata is give the URL along with the software and version
information needed to maintain the document for the long-term.
A document that is self-contained in one file and is
posted on the Web can be harvested by a spider. All you need to do at the time
you create metadata is give the URL along with the software and version
information needed to maintain the document for the long-term.
|
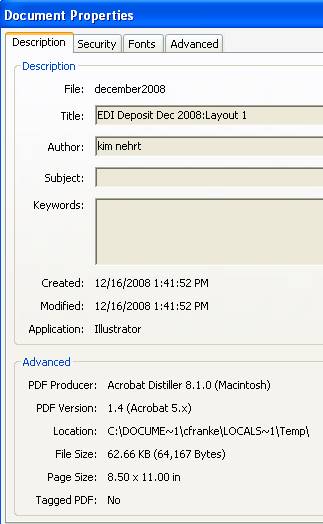
Finding Application and Version for a PDF file.


Open the Document
Properties by right clicking on the document or choosing Properties from
the File menu.
- Look for “PDF
Producer” to find the Software.
- Find the version
immediately after the Software.
|
Open the Document Properties by right clicking on the document or choosing Properties from the File menu.
|
|
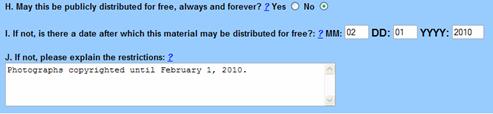
Copyright Information
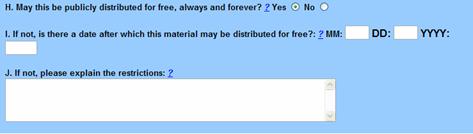
Most documents issued by state agencies are public documents with no restrictions on their use. Therefore, the default answer to the question “May this be publicly distributed for free, always and forever?” is Yes.
|
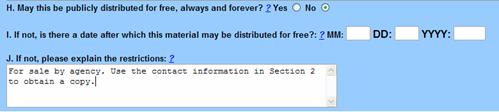
If your agency sells the document and it is not available for free distribution over the Internet, click the radio button to change the answer to no and explain this in a note. If after a certain period of time your agency wishes to make the document available free of charge over the Internet, enter the date after which it will be available free of charge.
Control Numbers
Frequently government documents have control numbers that aid the agency with tracking and distribution. Enter control numbers to help identify the document.
![]()
![]() Some are numbers assigned
by the agency.
Some are numbers assigned
by the agency.
![]()
![]() Other numbers, like
International Standard Serial Numbers (ISSN) are assigned nationally.
Other numbers, like
International Standard Serial Numbers (ISSN) are assigned nationally.
Document Numbering
If a publication has a projected end and is complete in one part or multiple parts, create one metadata record and deposit all of the publication together. Other publications are released in regular or irregular intervals. These are called serials and are handled differently. If you have one issue of a serial publication, deposit it as an individual document. The depository will link all issues of the serial together. That means you should:
· Record the title as it appears on the individual issue of the document;
· Assign keywords appropriate to the individual issue;
· Describe the individual issue;
· Etc., down through assigning subjects that fit the individual issue in Section 4.
Hint: Many government publications are serials!
Most serials, like a newsletter, are assigned numbering or dates so they can be arranged in chronological sequence. Look for numbering of this type and if it is present enter it in the next fields.
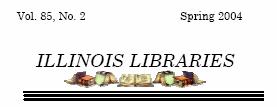 Issues of Illinois Libraries have both
numbering and dates. When both are present, enter the numbering. Date
information
Issues of Illinois Libraries have both
numbering and dates. When both are present, enter the numbering. Date
information 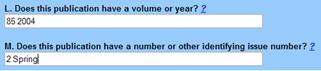
 is available in other
fields. Also, do not label the numbering. The depository will sort serial
issues by the numbering in these fields. Prefixes, like “Vol.,” will only throw
off the sorting and cause problems with arranging the issues in the proper
order. Enter only numbering or dates in these fields.
is available in other
fields. Also, do not label the numbering. The depository will sort serial
issues by the numbering in these fields. Prefixes, like “Vol.,” will only throw
off the sorting and cause problems with arranging the issues in the proper
order. Enter only numbering or dates in these fields.
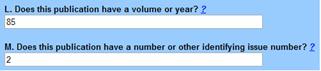
Look for words in the
title that indicate frequency, like annual report. Remember, do not enter the 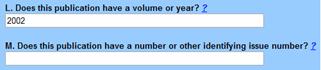 date in the title. Enter it here. Numbers in Field M
can be looked on as sub-numbering of the numbering in field L. This report has
no sub-numbering, so Field M is blank.
date in the title. Enter it here. Numbers in Field M
can be looked on as sub-numbering of the numbering in field L. This report has
no sub-numbering, so Field M is blank.
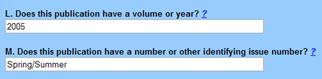
 In this case the sub-numbering is a word. It should
be entered exactly as it appears on the document.
In this case the sub-numbering is a word. It should
be entered exactly as it appears on the document.
 Agency Program
If your document is issued
in connection with an agency ![]() program, enter the official name of the program in
this field.
program, enter the official name of the program in
this field.
Related URL
Enter here a Web source
where the user can find additional information related to ![]() your document. This URL
will display as an active link within the metadata for this document in the
depository. It will remain in the depository at least as long as the Library is
able to preserve your document. Do NOT enter a URL that will not be available
on the Web for a long time, and do NOT enter the Web address of the document you’re
submitting. The depository is designed to keep your document available when it
is no longer available on your Web site.
your document. This URL
will display as an active link within the metadata for this document in the
depository. It will remain in the depository at least as long as the Library is
able to preserve your document. Do NOT enter a URL that will not be available
on the Web for a long time, and do NOT enter the Web address of the document you’re
submitting. The depository is designed to keep your document available when it
is no longer available on your Web site.
Language
The default for language
is English because most documents are issued in English. If your document is in
another language, use the pull down menu to select the 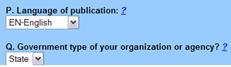 correct language for the publication.
Level of Government Publication
The default for government type is “State.” According to the Administrative Code, "State agencies" means every State office, officer, department, division, section, unit, service, bureau, board, commission, committee, and subdivision thereof of all branches of the State government and which agencies expend appropriations of State funds, regardless of the amount. This includes state universities.
Creating a Metadata Record – Subject Access
The last section of the
metadata record allows you to assign subject headings to your document  from a predefined list. The
list is based on the Jessica Tree, which was developed by Jessica Milstead. The
Jessica Tree is designed to provide subject access to government information.
See or print the whole list from http://finditillinois.org/metadata/subjtree.pdf
to understand the scope of the tree.
from a predefined list. The
list is based on the Jessica Tree, which was developed by Jessica Milstead. The
Jessica Tree is designed to provide subject access to government information.
See or print the whole list from http://finditillinois.org/metadata/subjtree.pdf
to understand the scope of the tree.
Scroll down through the list and select all headings that apply to your document.
|
|
|
|
|
To select multiple headings hold down the Ctrl key while you click on the appropriate headings. |
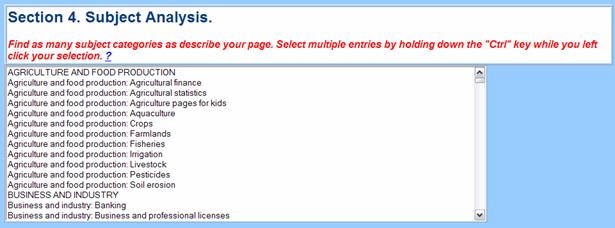
Select headings that match the level of your document. Assign the heading AGRICULTURE AND FOOD PRODUCTION to a general document that covers agriculture including many of the subdivisions listed above. However, if the document covers only a few aspects of agriculture, list the individual headings:
· Agriculture and food production: Aquaculture
· Agriculture and food production: Crops
· Agriculture and food production: Fisheries
Some topics are listed under several branches of the tree. Make sure you find all occurrences of your topic so the user will find your document no matter which branch of the tree he follows. For example, a document that describes veteran’s benefits and includes forms would be assigned:
· Federal Government: Military: Veterans’ affairs: Veterans’ benefits forms, and
· Forms: Veterans’ benefits forms.
To a document covering boating regulations that includes license application forms, assign:
· Forms: License Application Forms,
· Recreation and tourism: Sports: Water sports: Boating: Water craft licenses, and
· State government: Licenses and permits: Water craft licenses.
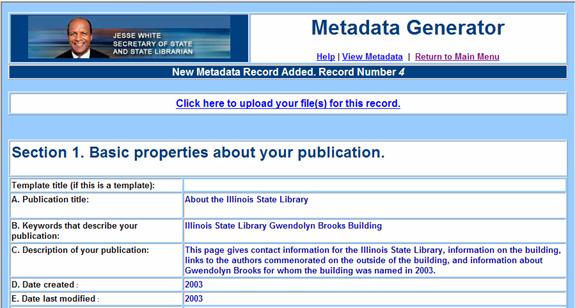
Now What?
You’ve reached the bottom of the data entry form. There are three buttons representing three choices:
![]() on the left side of the screen allows you to abort your work
and start over from scratch. If you click on this button, you will loose all of
your work since you opened the template or blank form for this record. Clicking
on the left side of the screen allows you to abort your work
and start over from scratch. If you click on this button, you will loose all of
your work since you opened the template or blank form for this record. Clicking
![]() in the header has the
same result.
in the header has the
same result.
![]() on the right of the screen will save your changes into a new
template.
on the right of the screen will save your changes into a new
template.
![]() in
the middle of the screen will format your metadata into a record for an
individual document. If required fields are not correctly filled in before
clicking on this button, you will receive an error message. When you click the
button on a record with all required fields completed, a screen appears with your
completed metadata. If in Section 1. G, you were able
give an URL for a single file for a spider to retrieve
from the Web you’re now finished depositing your first document. Your screen
will look like the screen on the right:
in
the middle of the screen will format your metadata into a record for an
individual document. If required fields are not correctly filled in before
clicking on this button, you will receive an error message. When you click the
button on a record with all required fields completed, a screen appears with your
completed metadata. If in Section 1. G, you were able
give an URL for a single file for a spider to retrieve
from the Web you’re now finished depositing your first document. Your screen
will look like the screen on the right:
You can use the link in the header to Return to the List or Return to Main Menu to begin your next record. If you’re finished, please remember to log out from the Main Menu.

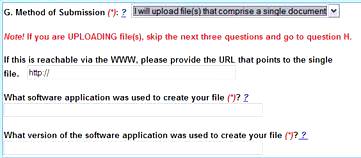
 However, if you have
multiple files or a file that will be on the Internet only a brief period of
time you will need to upload the file. If in Section 1.
G, you selected the option to upload files your screen will look like the
screen on the left:
However, if you have
multiple files or a file that will be on the Internet only a brief period of
time you will need to upload the file. If in Section 1.
G, you selected the option to upload files your screen will look like the
screen on the left:
Note that the main difference between these screens is the bar you can click on to begin the upload process.
Mark-up Language Files
If your document is in a mark-up language you will need to prepare it for uploading. Most mark-up language documents are composed of multiple files that the user’s browser reconstructs into a Web page. Coding in the document tells the browser where to find the various pictures, banners ,etc. that compose the page. A spider can be set to retrieve all of the URLs in a page, but it can’t tell the difference between a URL that is part of the page, such as an image, and a URL that links to other pages. It really has difficulty telling the difference between other pages that are part of the same document and those that are not.
Therefore, the person depositing Web pages needs to indicate which files are part of a document and which are not. There are two ways to do this with a mark-up language Web page.
· For each Web page that is part of your document, gather all of the files needed to reconstruct the page. Place them in a file on your computer and make sure the URLs in the page address the component files in the folder on your computer. Then follow the upload directions below. OR
· Use Adobe Acrobat Distiller to create a PDF file of your Web page. Then upload the PDF file with your metadata following the directions below.
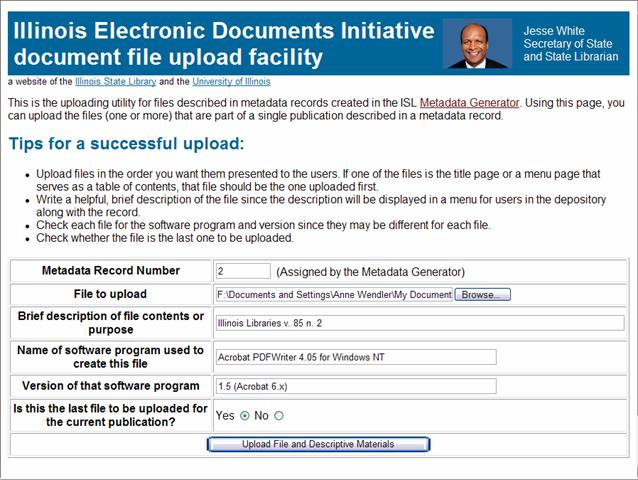
Uploading Files
Once you have all of the files comprising your document gathered together, consider the order in which they should display to the user. The files will list under the metadata record in the order in which you submit them.
· If you have a title page or table of contents page, submit it first.
· If your files represent chapters or sections of a printed document, submit them in the order they appear in the printed document.
· Submit picture files, style sheets, or banners under the file in which they display.
When
you have gathered the files on your computer click on the link: ![]() .
.
A
new 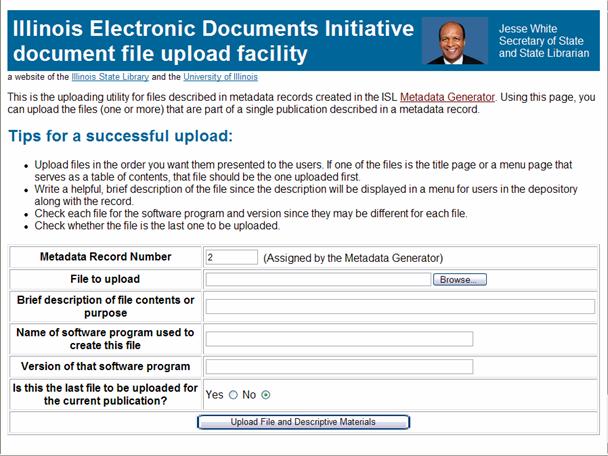 window will appear with the
upload form. You will need to complete the form for each file. Begin with the file
you want to display at the top of the list.
window will appear with the
upload form. You will need to complete the form for each file. Begin with the file
you want to display at the top of the list.
Note that the Metadata Record Number has been automatically filled in by the Metadata Generator.
Click on the browse button to select the file you want to upload. The file must be located on your computer or a server to which you have download access.
Enter a brief description or heading for the file. This description will display in the depository for the user the select files. Be accurate, but concise.
Enter the name of the software program used to create this file. The same software program may not have been used to create all of the files for one document. This information is critical to maintaining files for the long term. Be sure to enter the correct program for each file.
If you’re depositing PDF files, indicate the version of Adobe Acrobat used to create the file.
Then enter the version of the software program.
![]()
 A
completed form looks like the screen on the right:
A
completed form looks like the screen on the right:
Only when submitting the last file, change the radio button to Yes, indicating you’re uploading the last file. Once you click this button you’ll no longer be able to submit files for this document. On the other hand, if you don’t indicate that you’re finished uploading files your document will sit in pending files waiting for the final file before processing.
If you’re unable to upload files at the time you create the metadata record, or if you’re interrupted and cannot finish, you can always upload files later.
Click
![]() on the Main Menu. A blank upload
on the Main Menu. A blank upload 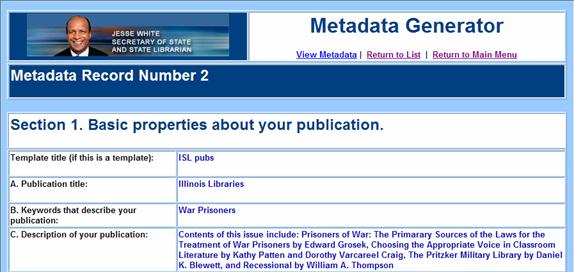 form
will appear. You will need to fill in the Metadata Record Number when you
access uploading files from the Main Menu.
form
will appear. You will need to fill in the Metadata Record Number when you
access uploading files from the Main Menu.
If
you need to look up the metadata record number, click ![]() on
the Main Menu. Find the correct record in the list and select it by clicking
on
the Main Menu. Find the correct record in the list and select it by clicking ![]() under its description. Your metadata record will display.
The number is at the top of the record.
under its description. Your metadata record will display.
The number is at the top of the record.
Note: Submitted documents need to go through processing at the ISL. They will not be available immediately.
Posting Metadata in Web Pages
The metadata you’ve created to submit with your document can also increase access to your document while it’s posted on the Web. If you have a mark-up language document, you can copy and paste the metadata in the <head> portion of the main mark-up language file of your document.
 When the Metadata Generator displays your new
metadata record as shown on the right you can click on the
When the Metadata Generator displays your new
metadata record as shown on the right you can click on the ![]() button in
the header. A new window will open displaying your formatted metadata.
button in
the header. A new window will open displaying your formatted metadata.
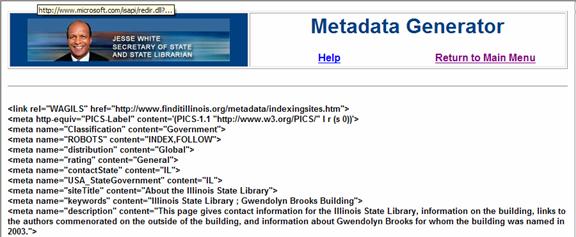 Copy and paste the metadata into the main page of
your document directly below the <head> tag as shown.
Copy and paste the metadata into the main page of
your document directly below the <head> tag as shown.
 When you’re
finished, close the extra window to return to your new metadata record.
When you’re
finished, close the extra window to return to your new metadata record.
Making Changes
If you wish to change your
metadata after you’ve 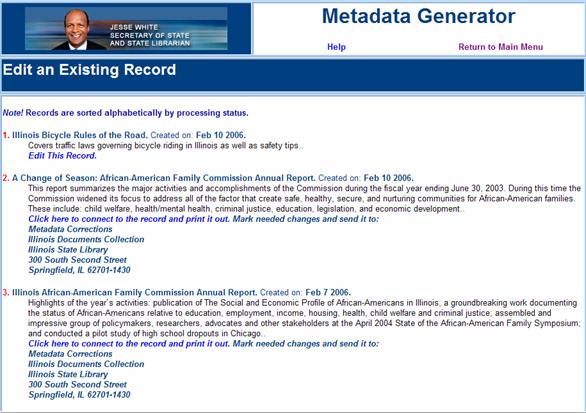 submitted it to the depository, you’ll need to follow
different procedures depending on the processing status of your record in
processing. The status of your record will display under the listing for the
record in the edit record list. To view the list click
submitted it to the depository, you’ll need to follow
different procedures depending on the processing status of your record in
processing. The status of your record will display under the listing for the
record in the edit record list. To view the list click ![]() on the Main
Menu. A list will display as shown at the left.
on the Main
Menu. A list will display as shown at the left.
Your records
are sorted alphabetically according to processing status. Records created
that same day can still be changed and will display at the top of the list.
Click ![]() beneath the record you want
to change. The record will open in a data input form. Edit the record with the
changes you want to make. Then click
beneath the record you want
to change. The record will open in a data input form. Edit the record with the
changes you want to make. Then click ![]() at the bottom of the
form. Your changes will be saved and submitted with your document when it’s
transferred from the pending file into the depository.
at the bottom of the
form. Your changes will be saved and submitted with your document when it’s
transferred from the pending file into the depository.
If your record has already been transferred to the depository you cannot make changes. While the record is being processed into the permanent files your record will say: Your record cannot be edited at this time as it is in processing.
If your record should be changed, but it is no longer the day of deposit, you’ll need to contact the Illinois State Library. Simply print out your record, indicate your changes and send it to: Bill Echelbarger, Illinois State Library, 300 South Second Street, Springfield, IL 62701-1796
 Maintaining Your Account
Please keep the user information for your login up-to-date. The Illinois State Library will use this information to contact you if there are changes to the metadata generator.
Edit the field you wish to
change. Then click ![]() . If you don’t want to store
the changes you made, click
. If you don’t want to store
the changes you made, click ![]() .
.
Log Out
When you’re finished
please remember to log out by clicking ![]() on the Main Menu.
on the Main Menu.
For questions or further information
Contact Connie Frankenfeld at (217) 782-5432
Electronic Documents of Illinois
Jesse White
Secretary of State and State Librarian
Last updated